Want the add free version of the reindeer lovey pattern? You can get it on my Etsy or Ravelry!
Pattern Description:
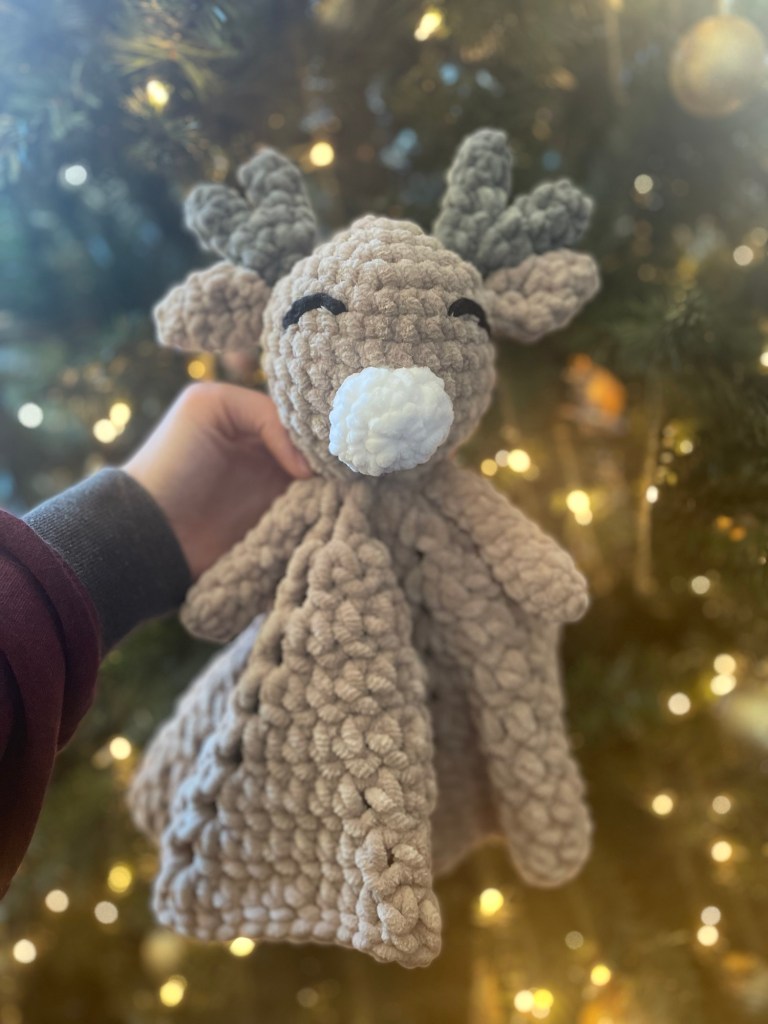
This adorable reindeer lovey is perfect for any littles first Christmas! It makes a great stocking stuffer or first Christmas photo prop! Plus, it works up so fast that you can make one for every little in your life!
Materials:
- Super Bulky Yarn for the main colour (colour a)
- Super Bulky Yarn for the antlers (colour b)
- Super Bulky Yarn for the snout (colour c)
- Worsted weight or another scrap yarn for the eyes
- 6.5mm crochet hook
- 8mm crochet hook
- Stitch marker
- Tapestry needle
- Pollyfill
Abbreviations
- MC = Magic Circle
- SC = Single Crochet
- SS = Slip Stitch
- DC = Double Crochet
- SC2TOG = Single Crochet Two Stitches Together
- BLO = Back Loop Only
- CH = Chain
Pattern Notes
- This pattern is made in 9 parts (head, blanket, 2 arms, 2 ears, snout). You will complete each part and then sew them together
- Do not slip stitch or chain at the start of the round, except during the blanket portion
- Place a stitch marker in the first stitch of each round to indicate the starting stitch
- 2SC indicates placing 2 single crochet in one stitch
- V ST = double crochet, chain 2, double crochet
- The chain 2 in the blanket portion does not count as a stitch
- You can use any super bulky yarn for this pattern! I used bernat blanket yarn and loved how it worked up
Head
Using colour a (brown) and a 6.5mm hook, MC, 6SC
Round 1: 2SC in each ST around (12ST total)
Round 2: *SC in the next ST, 2SC* repeat* around (18 ST total)
Round 3: *SC in the next 2 ST, 2SC* repeat* around (24 ST total)
Round 4: *SC in the next 3 ST, 2SC* repeat* around (30 ST total)
Rounds 5-9: SC in each ST around (30 ST total)
Round 10: *SC in the next 3 ST, SC2TOG* repeat* around (24 ST total)
Round 11:*SC in the next 2 ST, SC2TOG* repeat* around (18 ST total)
Roind 12: *SC in the next ST, SC2TOG* repeat* around (12 ST total)
Round 13: *in the BLO, SC2TOG* repeat* around (6 ST total)
Stuff the head
Round 14: *SC2TOG* repeat* around (3 ST total)
Fasten off, using the tail to close the small hole left at the bottom if the head
Arms (Make 2)
Using colour a (brown) and a 6.5mm hook, MC, 4SC
Round 1: 2SC, SC, 2SC, SC (6 ST total)
Rounds 2-9: SC in each ST around (6 ST total)
Add a small amount of stuffing to the end of the arm, leaving the top of the arm without stuffing
Fasten off, leaving a long tail to sew the arms to the head
Ears (Make 2)
Using colour a (brown) and a 6.5mm hook, MC, 5SC
Round 1: SC in each ST around (5 ST total)
Round 2: 2SC in each ST around (10 ST total)
Rounds 3-4: SC in each ST around (10 ST total)
Fasten off, leaving a long tail to sew the ears to the head
Antlers (Make 2)
Using colour b (grey) and a 6.5mm hook
Part 1: MC, 4SC
Rounds 1-2: SC in each ST around (4 ST total)
Fasten off
Part 2: MC, 4SC
Rounds 1-2: SC in each ST around (4 ST total)
Round 3: SC in each ST around (4ST), then SC in each ST around part 1 (8 ST total)
Round 4: SC2TOG around (4 ST total)
Fasten off, leaving a long tail to sew the antlers to the head
Snout
Using colour c (white) and a 6.5mm hook, MC, 6SC
Round 1: 2SC in each ST around (12 ST total)
Round 2: SC in each ST around
Fasten off, leaving a long tail to sew the snout to the head
Blanket
Using colour a (brown) and a 8mm hook, MC,CH 2, *2 DC, CH2* repeat* 5 times, SS to the first DC (6 CH 2 spaces total)
Rounds 1-8: CH 2, DC in each ST until the CH 2, *V ST, DC in each ST* repeat* around, SS to the first ST
Fasten off and weave in ends
Assembling the Lovey
Attaching the Arms to the Head:
Using a tapestry needle and the BLO line from the head portion, attach your arms
I recommend using stitch markers to attach the arms first, and make sure you’re happy with the placement
Note: when stitching the arms to the blanket make sure you go through both loops on the arms, therefore you’re stitching the arms together while stitching them to the head
Attaching the Blanket to the Head:
Take the tail from the head and the tail from the starting MC in the blanket and tie them together. Then use either tail to attach the blanket to the head by sewing the blanket to the BLO portion of the head
Attaching the Snout to the Head:
Line the bottom of the snout centred between the arms and 2 stitches above where the blanket and body attach. Sew to the head
Attaching the Ears to the Head:
Fold the ears together along the bottom and sew them together
Line the ears to the head, about 6 Stitches below the starting MC and in line with the starting MC, then sew the ears to the head
Attaching the Antlers to the Head:
Sew the antlers to the stitch directly beside the ears, in line with the front of the ear
Eyes:
Using scrap yarn and a smaller hook, CH 8 (or your desired eye length). Place eyes on head and sew to the head
Tip:
I recommend that you place the snout, ears, antlers and eyes on the lovey using stitch markers before you sew each individual piece to the lovey. This will help make sure you’re happy with the placement of each piece!
Pattern Complete!
Show off your reindeer lovey on Instagram by using #mountainsofyarn and tagging me @mountains.of.yarn
Do not redistribute this pattern in any way. You’re welcome to sell finished makes made with this pattern!

Leave a comment